Windows 10 provides several ways to take screenshot of your entire screen or just a selected part.
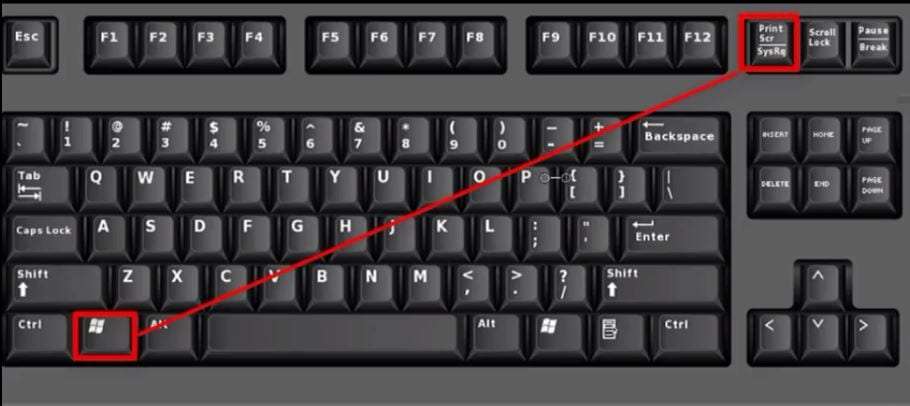
The simplest way to take a screenshot on Window 10 is the Print Screen key (PrtScrn). This button is usually located at the top row of the keyboard, near the Function keys. To capture your entire screen , you can simply press Window button & PrintScrn key button together & save it.
On some keyboards, you might need to press the Function (Fn) & the Print Screen button to trigger the screen capture.

How to take selected part screenshot on Window 10?
Use Snipping Tool to capture a selected part of the screen. The Snipping Tool is the simplest tool to take a screenshot on Window.
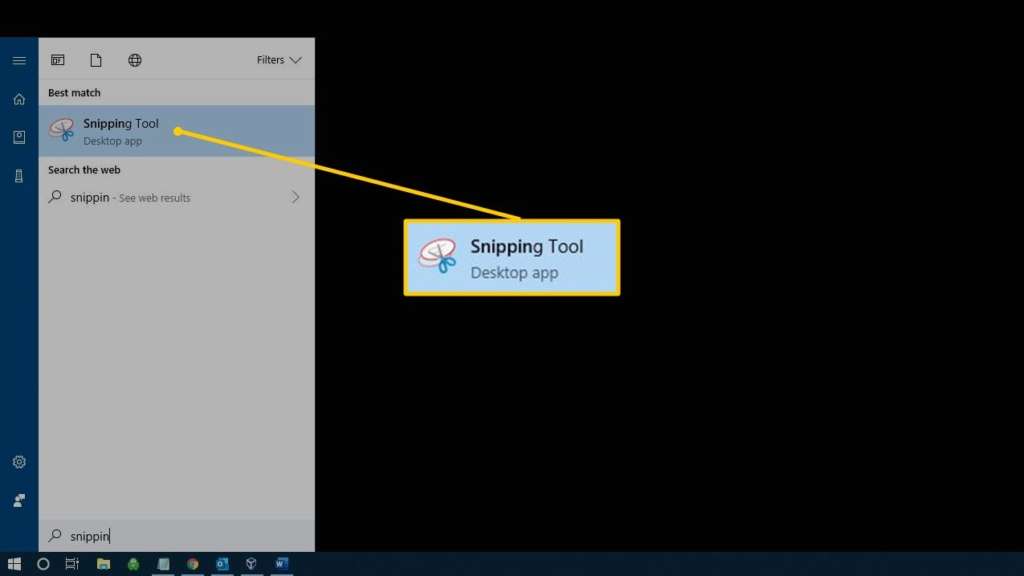
- On the search bar , type Snipping Tool.
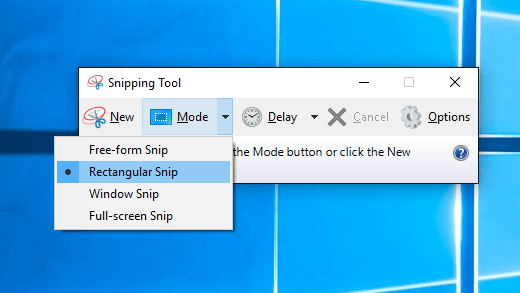
- A new window pop up, here select the “Mode” of the snip (free-form snip, rectangular snip,a window snip or entire screen snip).
- Click New, & your screen will freeze. You can now use the mouse to take a screenshot. The screenshot will appear in the Snipping tool window.
- If you want include something like tooltip, which only appears after a mouse movement, you can specify how long to wait before taking a screenshot, use Delay menu.
- If you want to, once you’ve taken your screenshot, you can use the drawing tools to annotate the screenshot.
- When you’re done, click “File” & then click “Save As” to save your screenshot.